General manual (How to start)
Welcome to our Digital Signage software. Curious how our solution works? We explain it to you in 7 steps:
1. Go to My account
1a. Check all data. If these are incorrect or inconsistent, you can adjust them.
1b. Add your company logo (you can use this logo later in templates)
1c. Add your company colors (you can use these colors later in templates)
1d. Add a font if available (this is used by default with all templates)
1st. Enable Service Workers when using this platform as a Digital Signage package
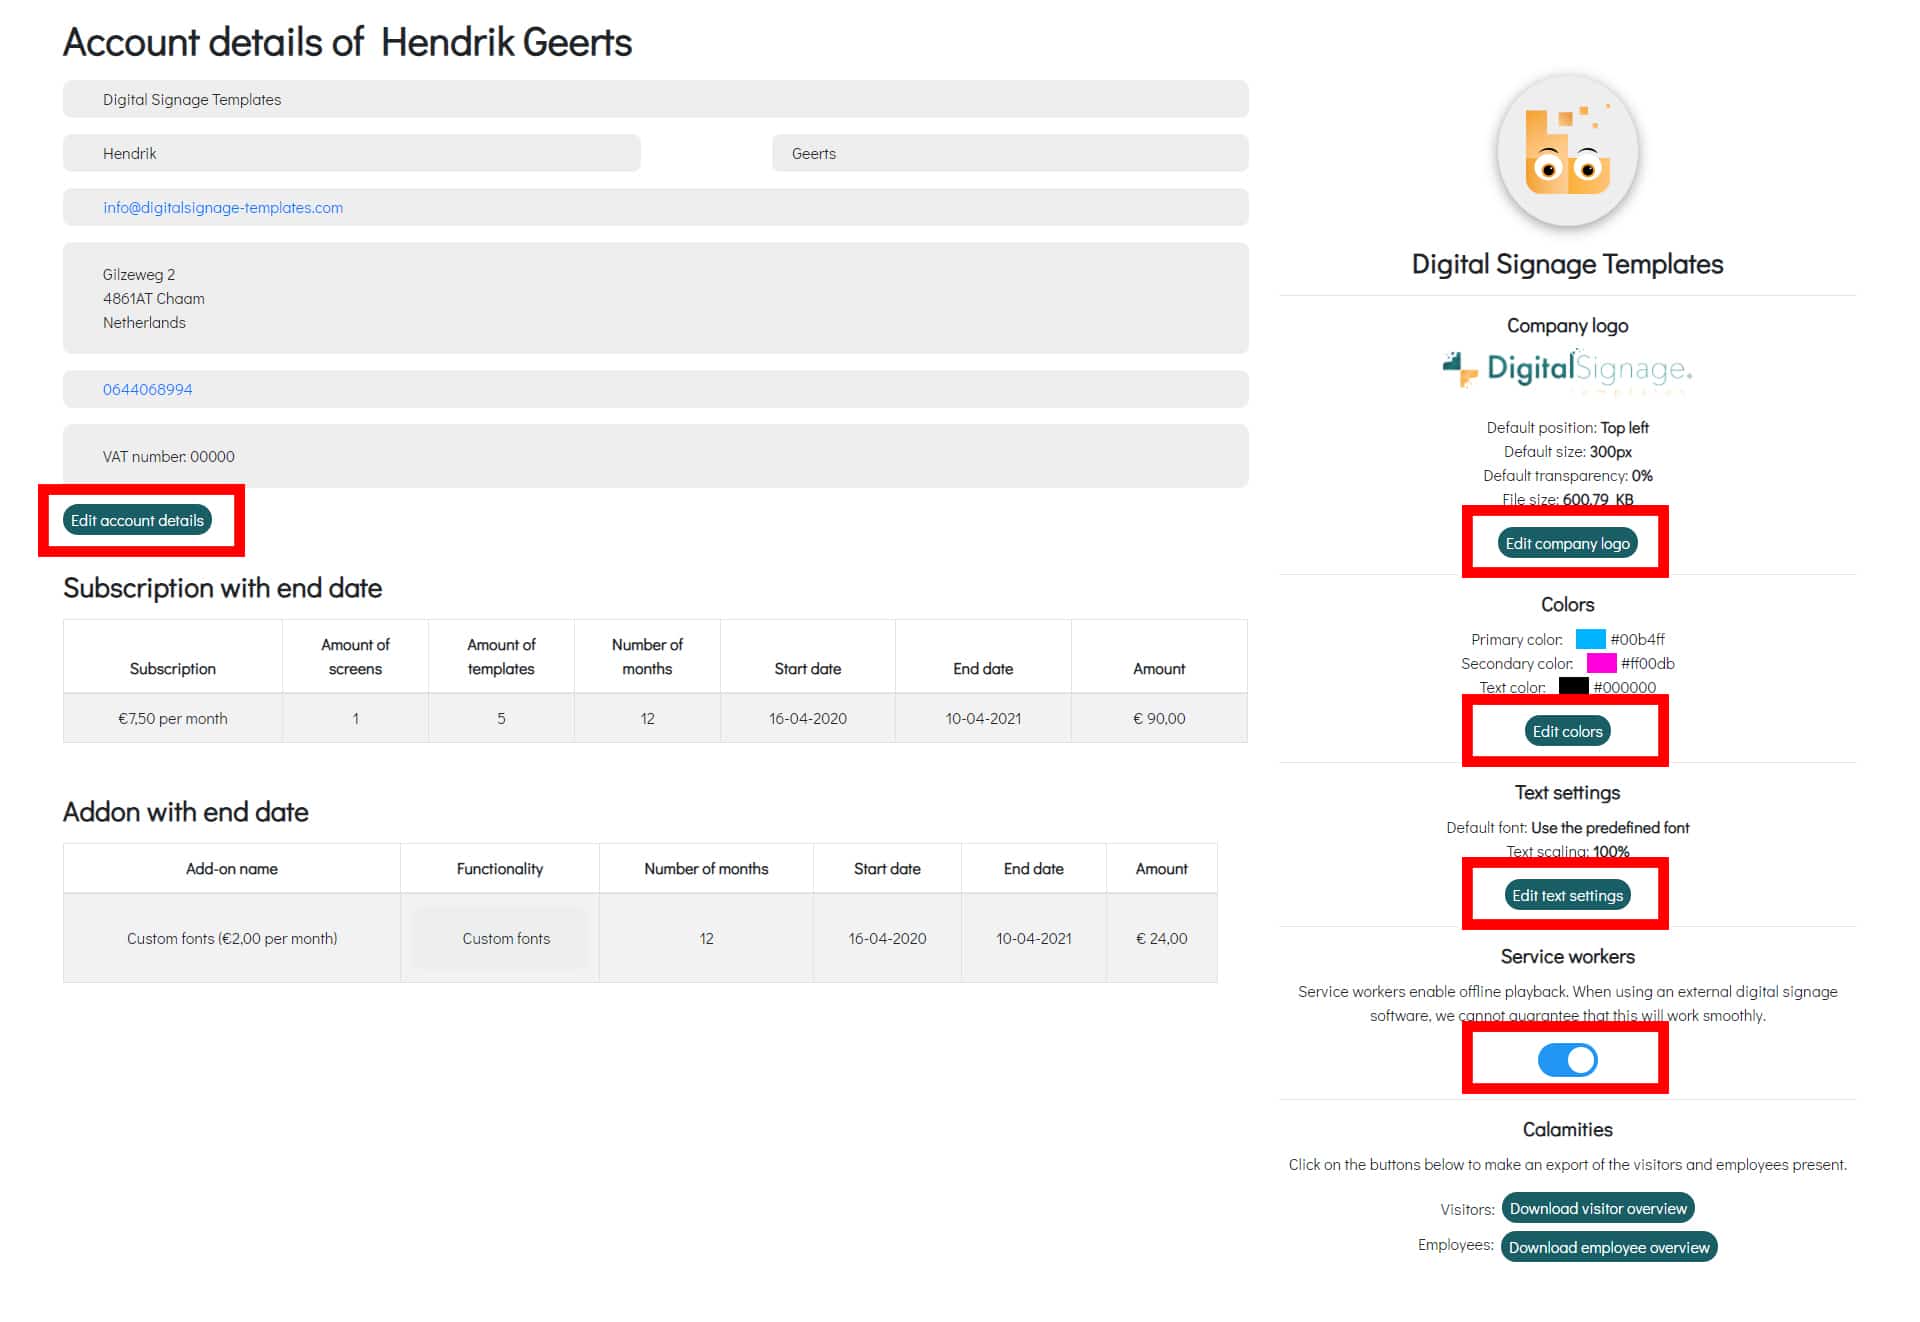
More about My Account, click here.
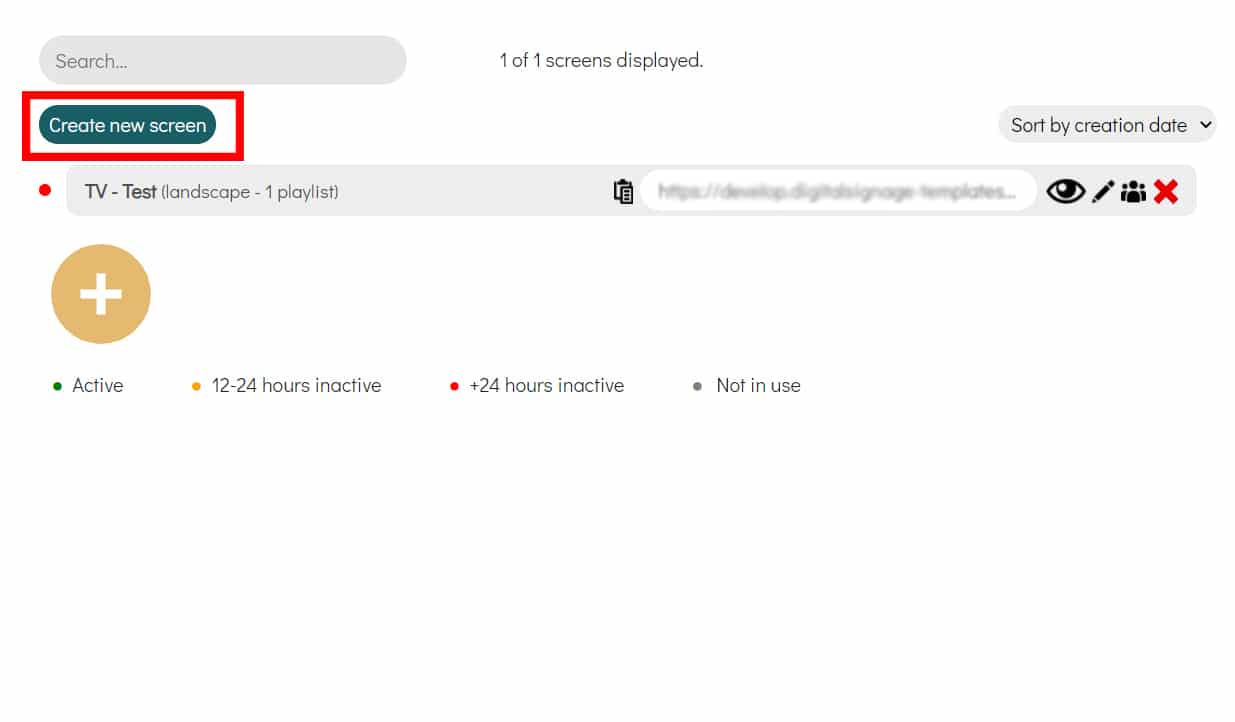
2. Go to Screens
*Do you only use our platform for templates? Then go to step 4.
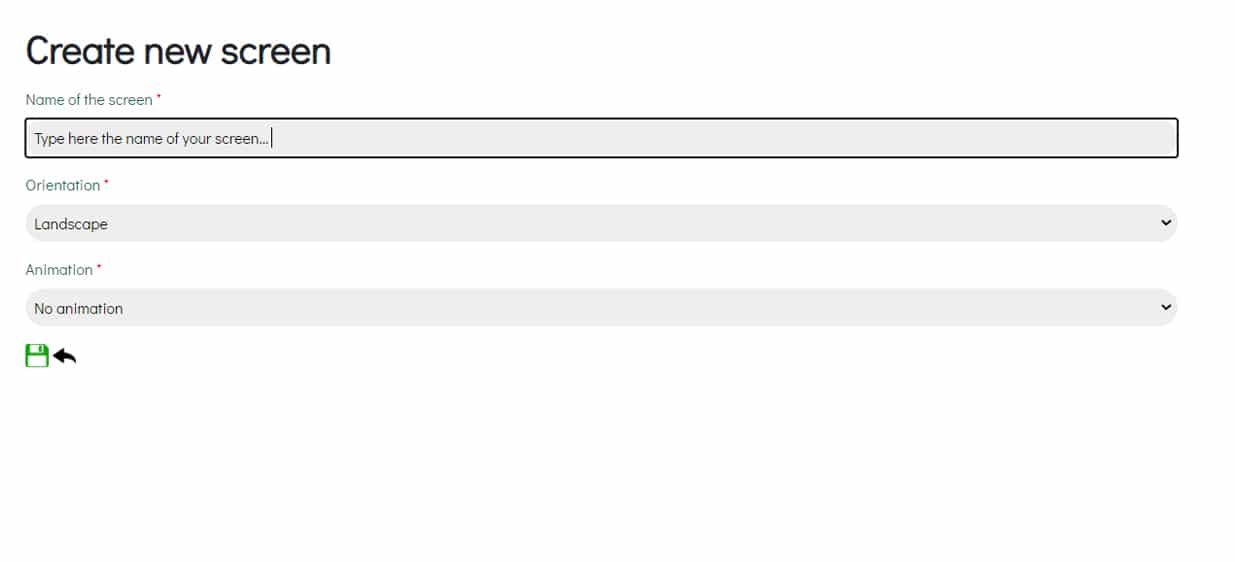
2a. Add all screens within the screens level. These are the physical displays you have.
2b. Specifies a name for the display
2c. Choose the orientation (landscape or portrait)
2d. Choose an animation for the transit site between all templates
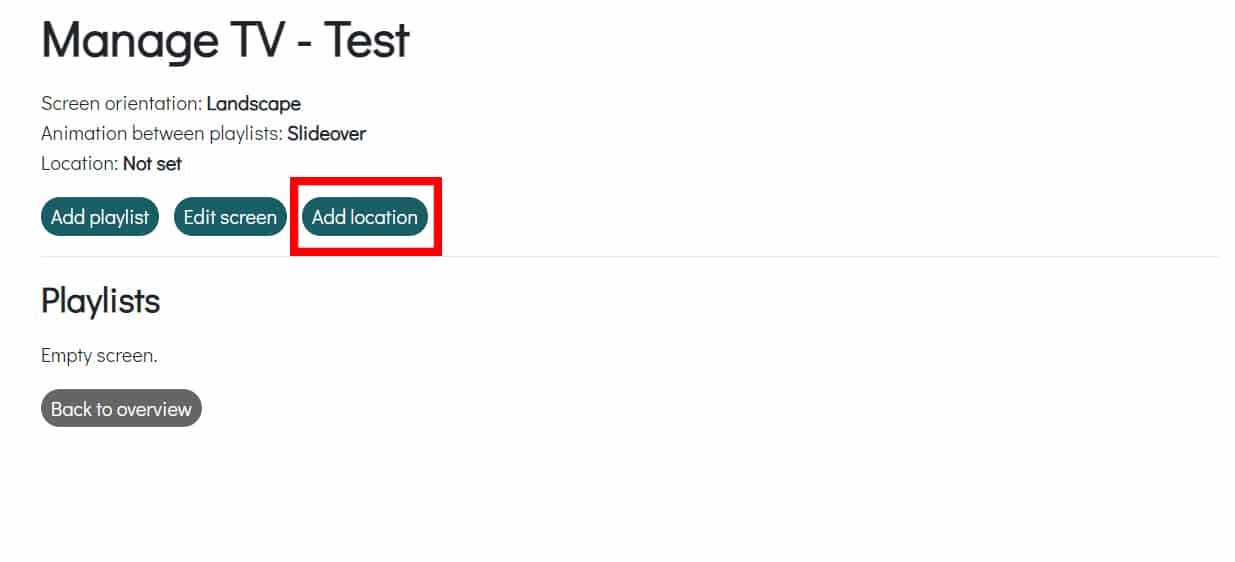
2nd. After creating a screen, you can provide this screen with a location. Enter your company name or address click on search. Then assign the correct location.
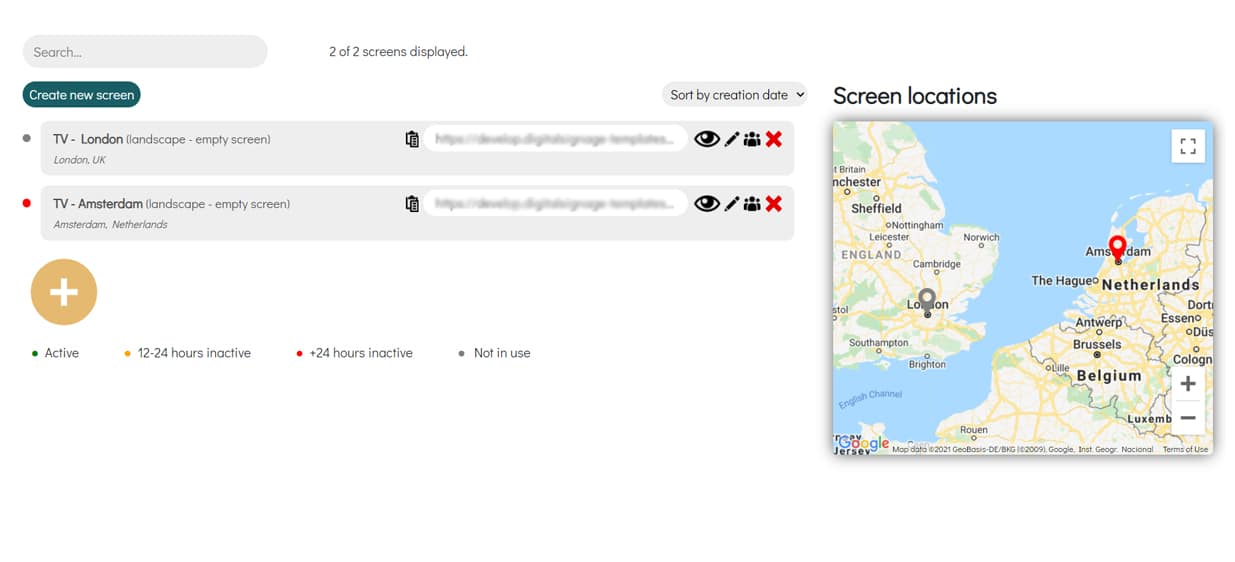
When you have created your own screens, the overview screen looks like this:
More information about screens, click here.
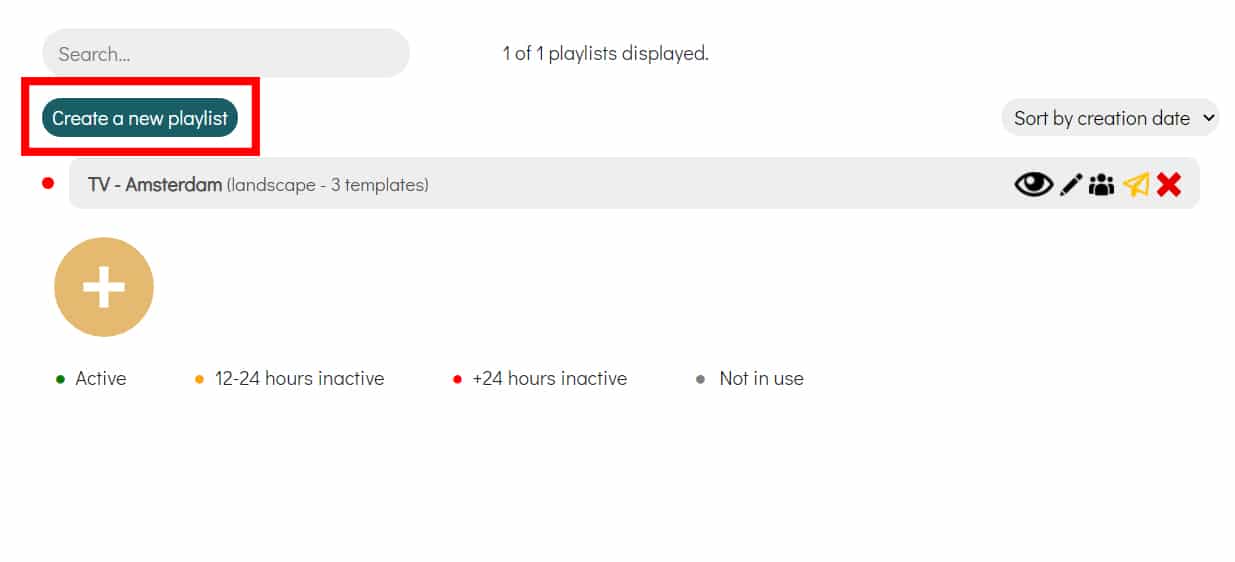
3. Go to Playlists
3a. Go to Playlists
3b. Create a new playlist. Usually one playlists are created at screen level and one playlist for all screens. In short, which groups do you want to control your screens?
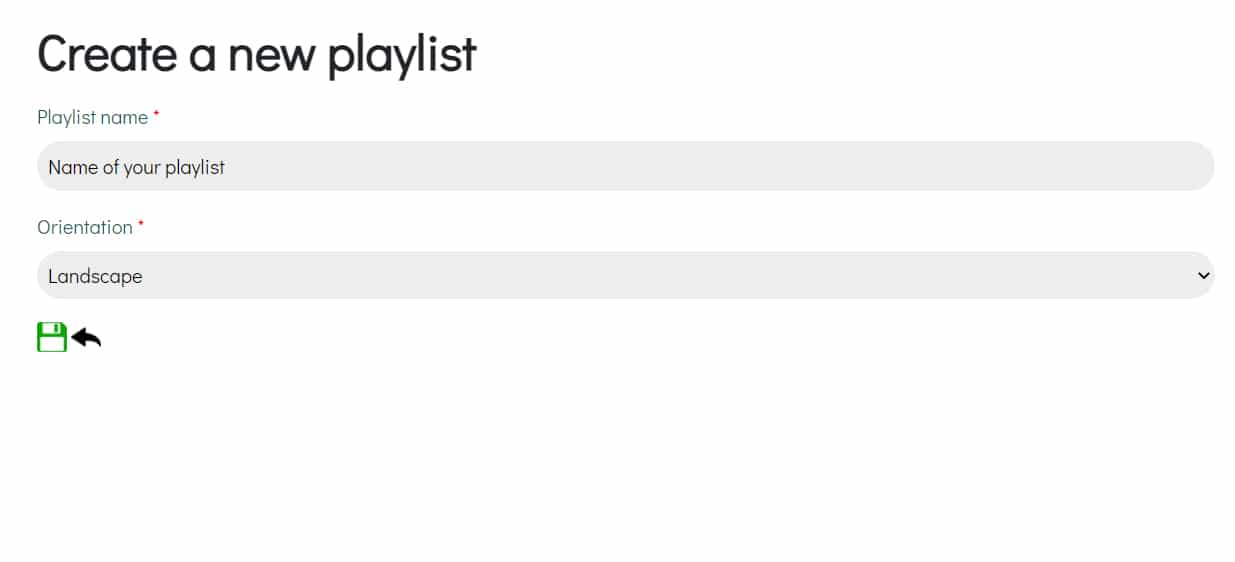
3c. When creating a playlist, you give the playlist a name and choose the orientation.
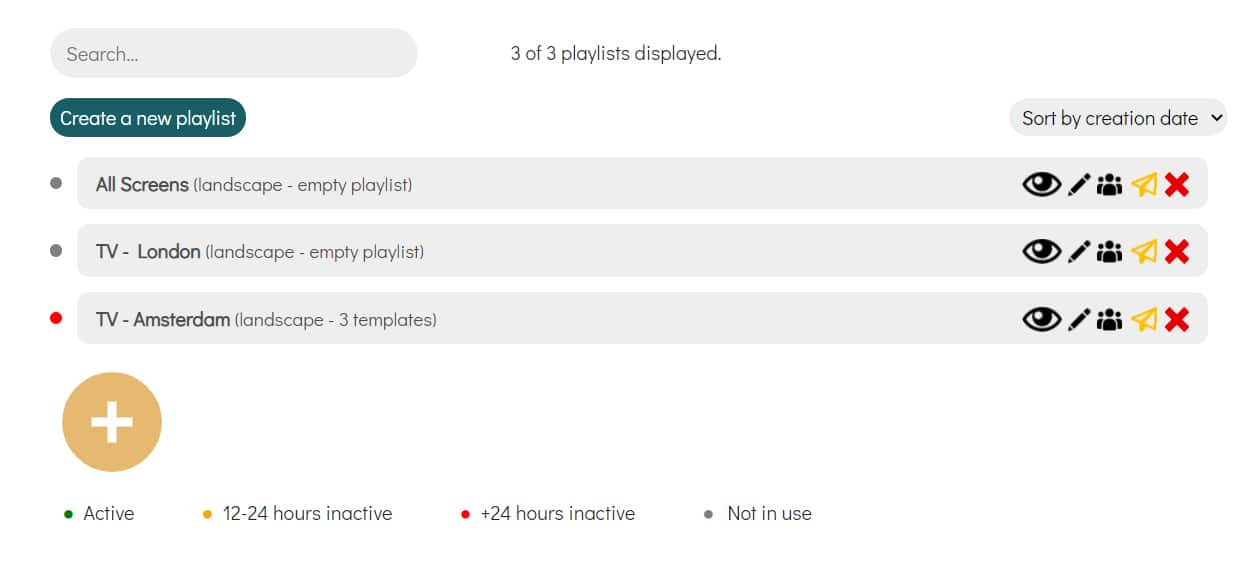
3d. After creating all the desired playlists, the overview will look like this:
More information about Playlists, click here.
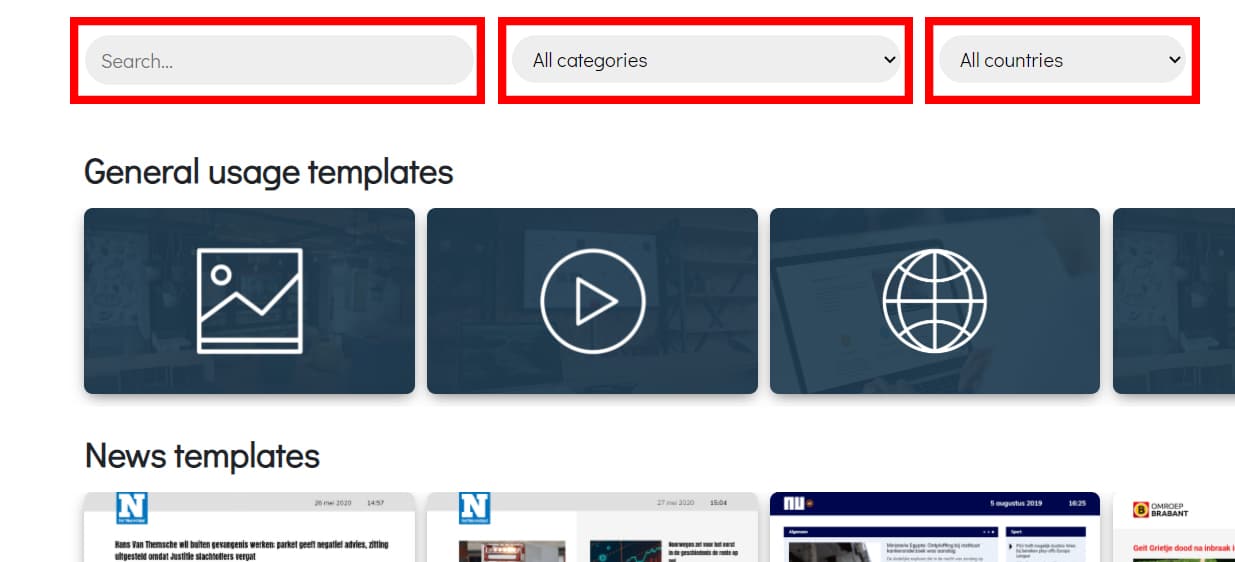
4. Go Create templates
4a. This is the overview of all available templates. In this overview you can choose a template and edit it. You can search by name, filter categories or use custom templates.
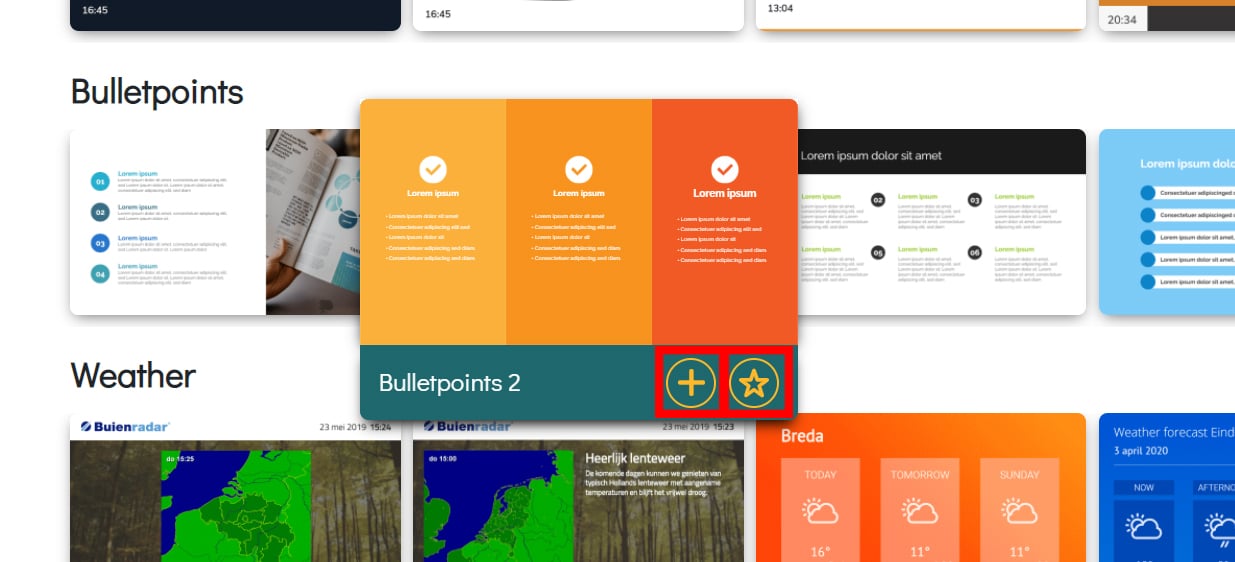
4b. When you have chosen template, you can edit it by placing your computer mouse on the template. Then click on the 'plus' icon to edit the template. Do you want to reuse it more often? Then click on the 'star' icon to save this template as a favorite.
More information about Create templates, click here.
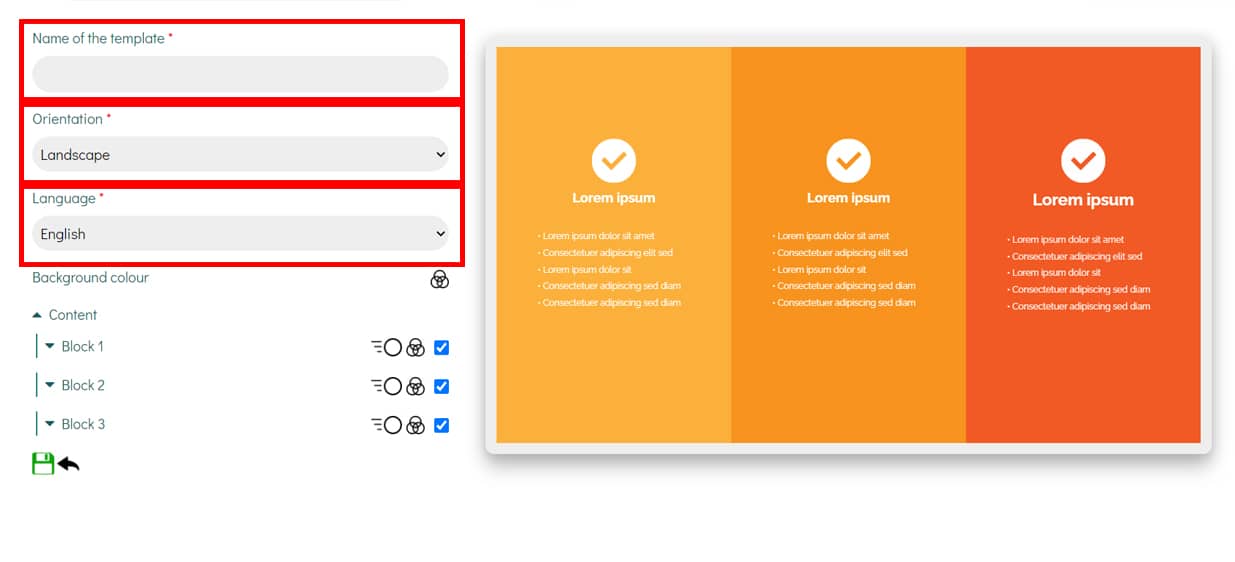
5. Edit your template (editor)
5a. When opening the editor there are always 3 basic fields. Enter the name of the template here, choose the orientation and language.
5b. The other fields in the editor differ per template. Depending on which template you edit, there are options to adjust the template. You can click out options.
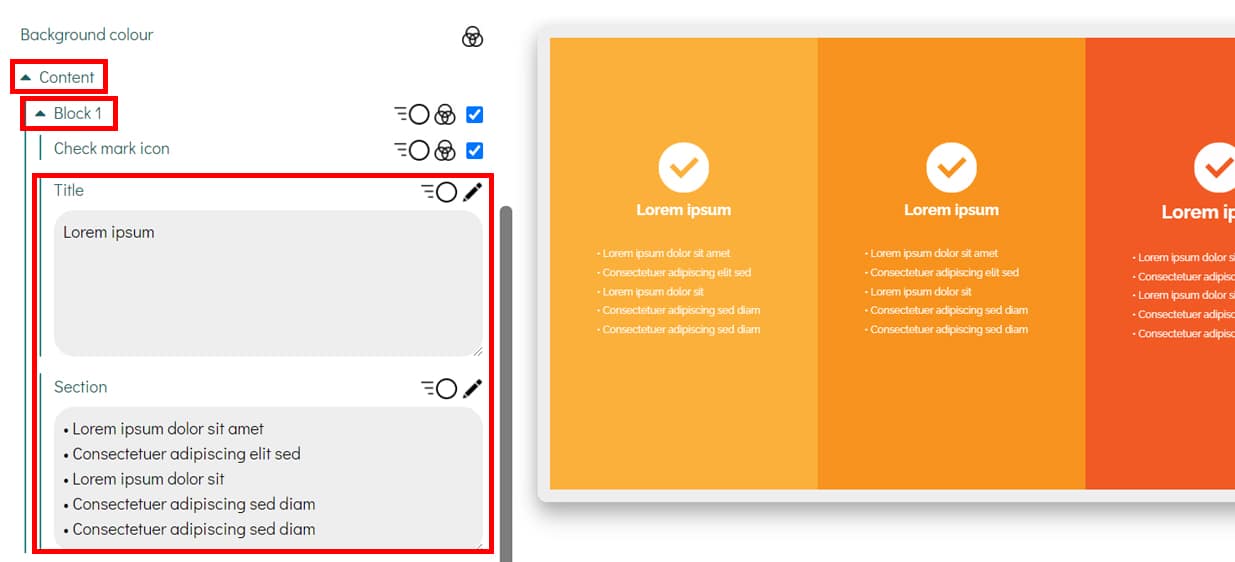
5c. Customize any content, images, videos and save the template. You will then be forwarded to My Templates.
More information about the editor, click here.
6. My Templates
6a. In this overview you will find all created and saved templates. You can edit, preview, publish and delete existing templates from this level.
6b. If you have many templates, it is useful to use the search and / or filter function.

*For users who only use this platform for templates in combination with another Digital Signage system - -> copy and paste the template URL here to import it into your own software.
6c. When you are satisfied with the template, you can publish it on a screen. For this we first have to link the playlists to the correct screens (this is a one-time process and must be performed once after creating a new playlist).
7. Publish playlists in screens
7a. Go to the Screens level and click on the 'pencil' icon. You are now in the screen.
![]()
7b. Then click on the 'Add Playlist' button. You will then see an overview of all created playlists. In this window you can add playlist per playlist to the screen.
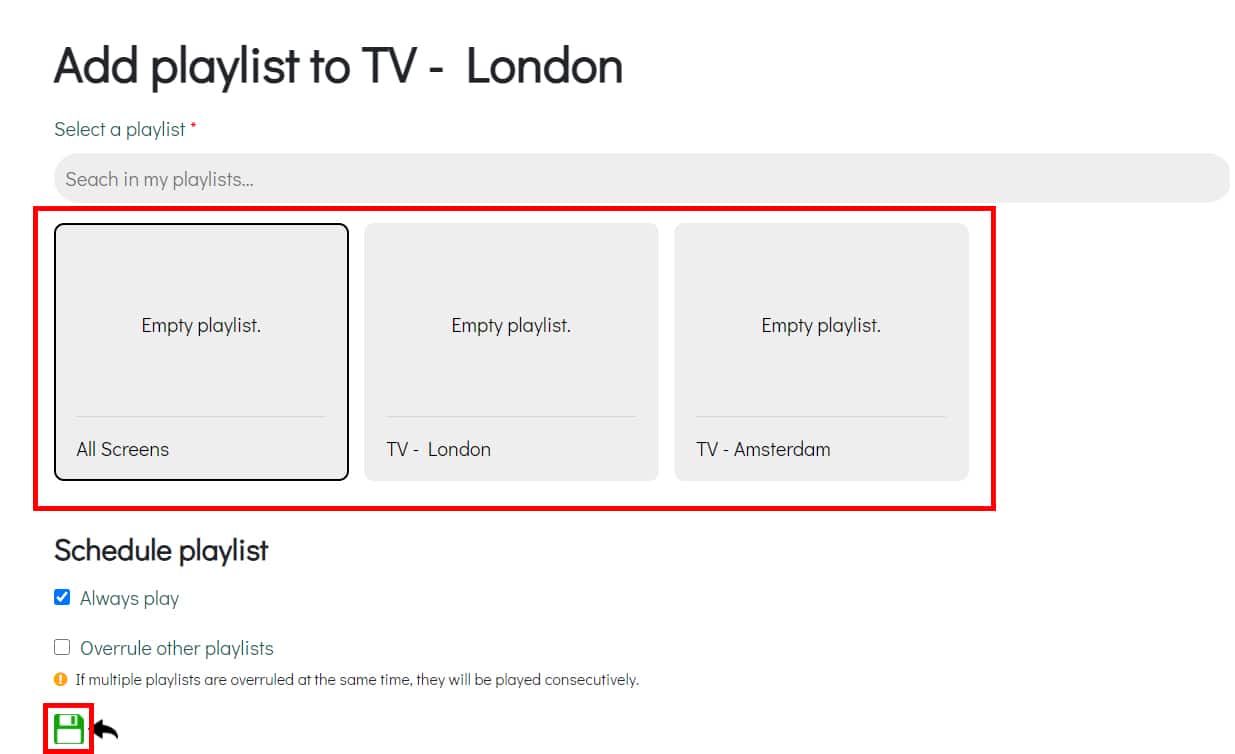
7c. During this one-time process, it is determined which playlists are played in this display. In this example it makes sense that we add the Display London playlists Display London and All Screens.
This looks like this:
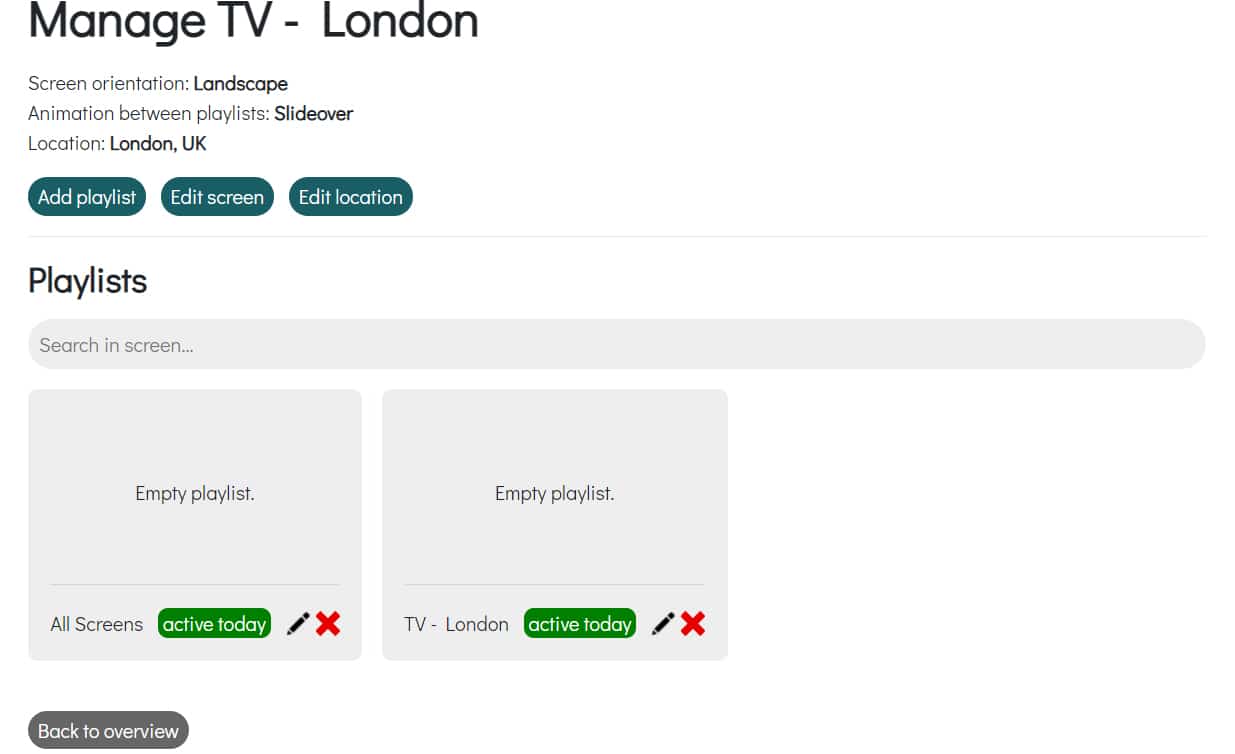
In this case, the playlist 'All Screens' is played first and then 'Display London'. The order can be changed by dragging and dropping. All templates that are now published in this playlist are displayed on the screen.
This process is one-time. From now on you can add all templates in playlists. These are then automatically displayed on the screen.
After this step, the playlists can be filled with templates.
8. Publish templates in playlists (on your screens)
8a. Go to Playlists. You will see an overview of all playlists (groups).
8b. Open a playlist by clicking the 'Pencil' icon. In this step you therefore determine: On which screen do I want to publish this template. For example, is this a group, on a specific screen or all screens?
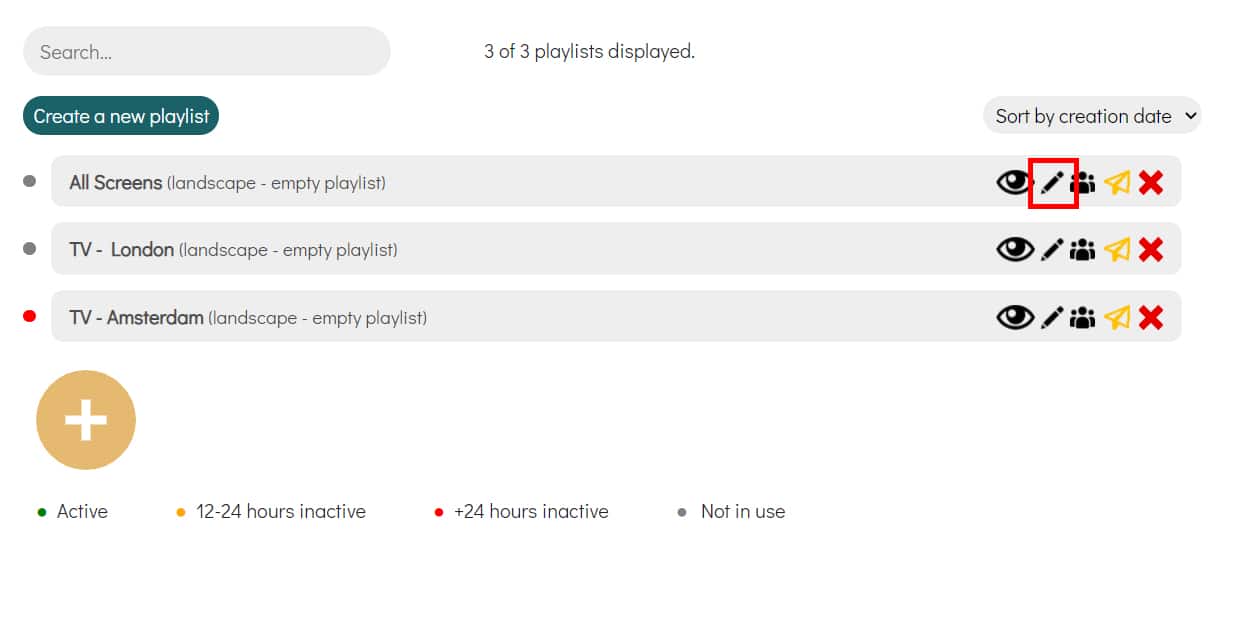
In the above example I want to publish a template on all monitors. I therefore open the playlist 'All Screens'.
8c. When you are in the playlist, click on Add template. You will then enter a window where you can see all your own templates.
8d. Select the template you want to publish and enter a time period. Provide this template with a schedule if necessary. Do you always want to play the template? Then leave the settings as they are.
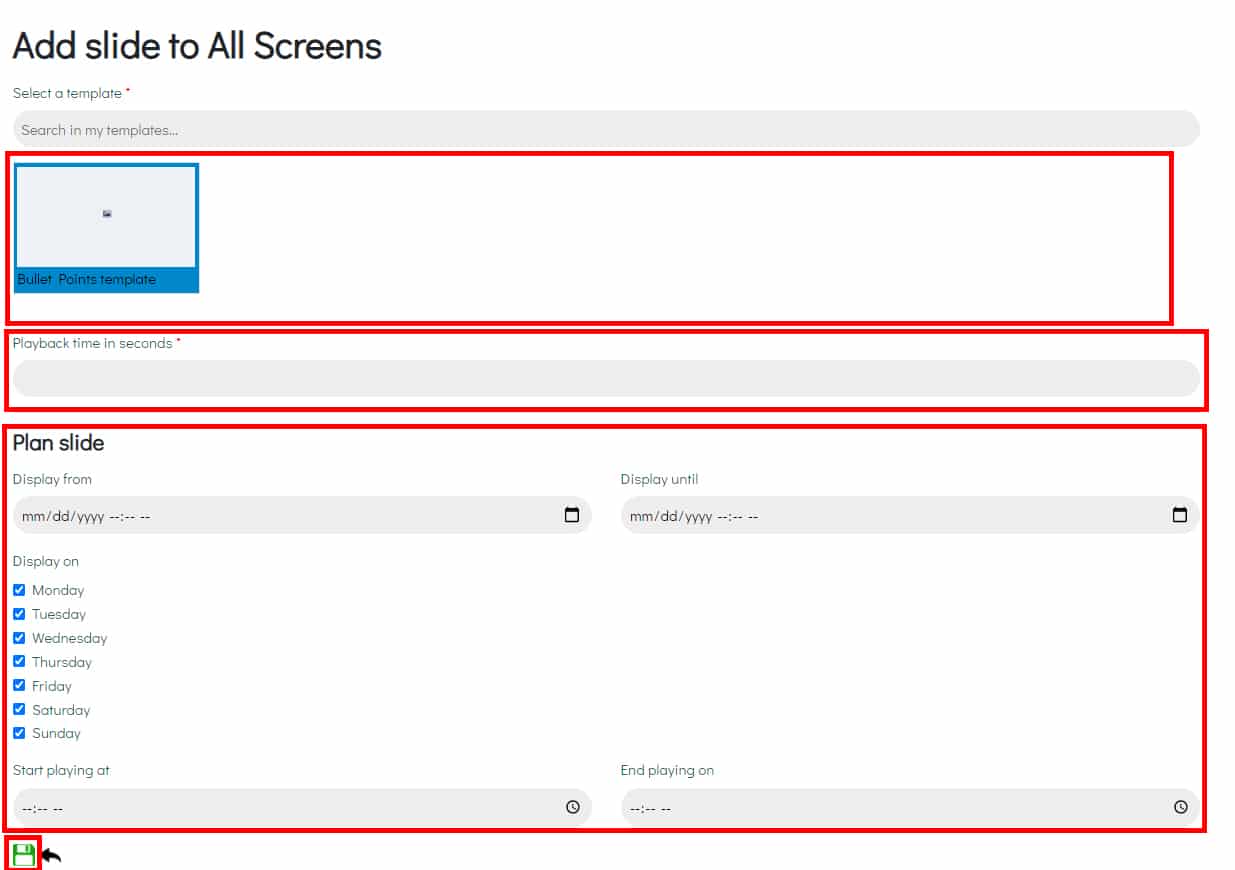
When you have clicked save, the template is immediately added to the screen. This can take a few minutes.